
Beginner
10cm wide, 15cm tall
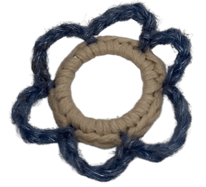
Dreamcatcher (Free pattern)
Create your own dreamcatcher with this beginner friendly pattern. This is super quick to work up and is a great stash busting project! Mix and match yarn colors and textures to make your dreamcatcher uniquely yours.
Dreamcatchers are traditionally used as a form of protection to literally “catch” bad dreams, spirits, or other negative energy, and are sacred in some communities. In this environment of inclusivity and diversity, remember to use your dreamcatcher in a way that honors the sacred practices of these communities. Read more about this here.
Materials
- 1 key ring (2.8cm outer diameter)
- 1 metal hoop (10cm outer diameter)
- 15-20g DK yarn
- 4mm crochet hook
- Bead, bell, etc (optional)
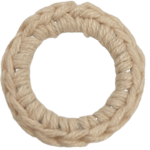
Part 1: Crochet around the key ring (video tutorial)
- Make 17 sc around the key ring and mark the first st with a st marker.
- Join the round with a sl st into the marked st
-
Cut yarn and thread the yarn tail to the back of your work. Tie both yarn ends together in a dead knot and trim the ends.
St count: 18 sc
Part 2: First layer of loops (video tutorial)
- With new yarn, make a sl st into the marked st from Part 1
- ch 6
- Skip 2 sts on the key ring and sl st into the next st
- Repeat step 3 and 4 five more times.
- Cut yarn and thread the yarn tail to the back of your work. Tie both yarn ends together in a dead knot and trim the ends.
St count: 6 small loops, 6 sl st
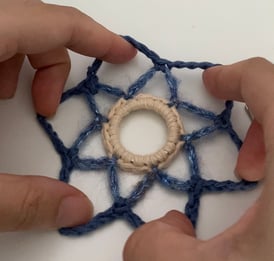
Part 3: Second layer of loops (video tutorial)
- Make 1 sc into a ch6 loop. Mark this stitch with a st marker
- ch 8, sc into the next loop
- Repeat Step 3 four more times. You should have 5 loops on this round.
- ch8, sl st into the first sc (marked) to complete the 6th loop
- Cut yarn and thread the yarn tail to the back of your work. Tie both yarn ends together in a dead knot and trim the ends
St count: 6 large loops, 6 sc
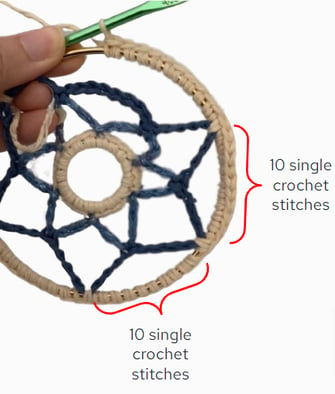
Part 4: Crochet around the hoop (video tutorial)
- Make 1 sc around both the metal hoop and a ch8 loop. Put a marker on this stitch
- Make 10 sc around the metal hoop only
- Make 1 sc around both the metal hoop and the next ch8 loop
- Repeat Steps 3 and 4 four more times
- Make 10 sc around the metal hoop only
- sl st into the first sc (marked) to complete this round
- ch 15 to make your hanging loop,
- sl st into the first sc (marked)
- Cut yarn and thread the yarn tail to the back of your work. Tie both yarn ends together in a dead knot and trim the ends
St count: 66 sc
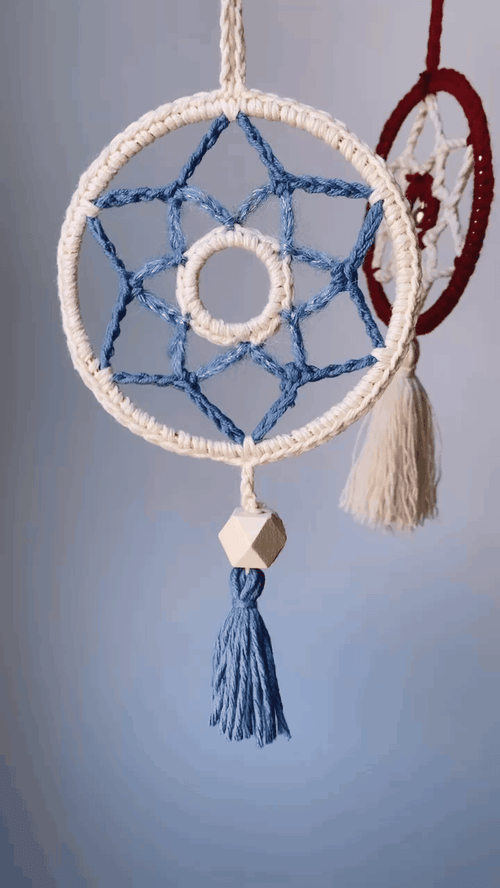
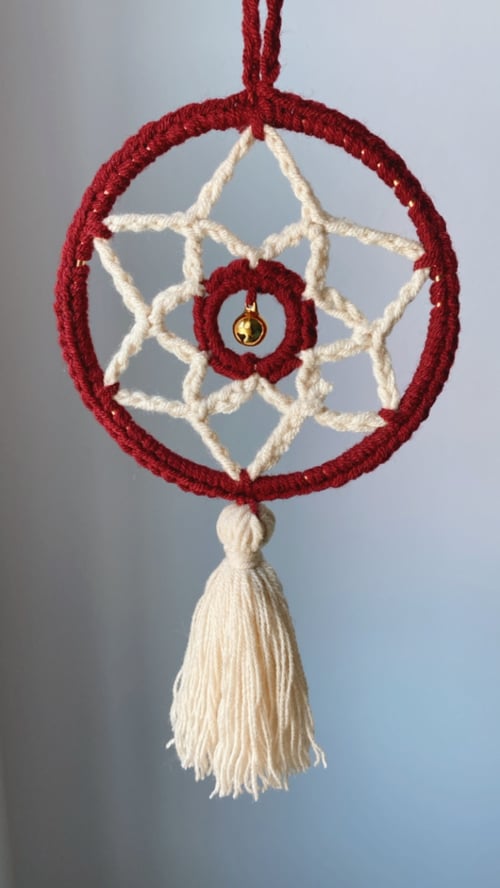
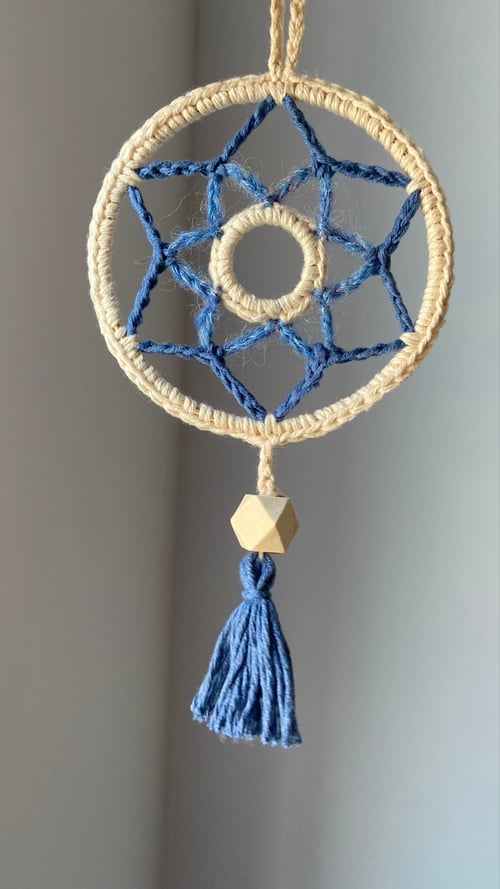
Part 5: Decorate your dreamcatcher!
Use bells, beads and tassels to dress up your dreamcatcher!
For the red sample, I added the bell in the middle of the key ring with some yarn of the same color.
Watch this video tutorial to see how I made a tassel, and attached a wooden bead and tassel to my dreamcatcher (blue sample).
To make your tassel look more fluffy (like the red sample), use a fine-tooth comb to comb through the yarn strands. The strands will be wavy at first so I recommend lightly steaming the strands to straighten them!
Your dreamcatcher is complete :) I hope you enjoyed making this and please tag @offhook.creations me on your photos so that I can see them!